Is your aloe vera looking sad, droopy, or changing colors? You’re not alone! These hardy succulents have a reputation for being nearly indestructible, but even the most well-intentioned plant parents make some common aloe vera care mistakes. The good news? Most aloe problems are easy to fix once you know what’s wrong. In this guide, I’ll walk you through the five biggest aloe vera care mistakes and show you exactly how to get your plant back to its happy, healthy self.
- Understanding Your Aloe Vera's Basic Needs
- Mistake #1: Drowning Your Aloe With Kindness (Overwatering)
- Mistake #2: Giving Your Aloe the Wrong Light
- Mistake #3: Using the Wrong Soil and Pot
- Mistake #4: Ignoring Pests and Diseases
- Mistake #5: Improper Fertilizing and Temperature Stress
- Mastering the "Soak and Dry" Watering Method
- When and How to Repot Your Aloe Vera
- Propagating Aloe Vera: Growing Your Collection
- Conclusion: Your Path to Aloe Vera Success
- Get Your Free Guide
Understanding Your Aloe Vera's Basic Needs
Before we dive into the mistakes, let’s quickly cover what makes aloe vera thrive. These desert natives are built for survival, but they do have some non-negotiable needs:
- Light: Bright, indirect sunlight is ideal. A south or west-facing window usually works great.
- Water: Less is more! Allow the soil to dry completely between waterings.
- Soil: Well-draining cactus or succulent mix is essential.
- Temperature: They prefer 55-80°F (13-27°C) and can’t tolerate frost.
- Container: Pots with drainage holes are a must.
Now that we know what aloe vera plants need to thrive, let’s look at the most common aloe vera care mistakes that might be causing your plant problems.
Mistake #1: Drowning Your Aloe With Kindness (Overwatering)
If there’s one thing that kills more aloe plants than anything else, it’s overwatering. We’ve all been there – you love your plant so much you want to give it plenty of water. But for aloe vera, too much love in the form of water is actually harmful!
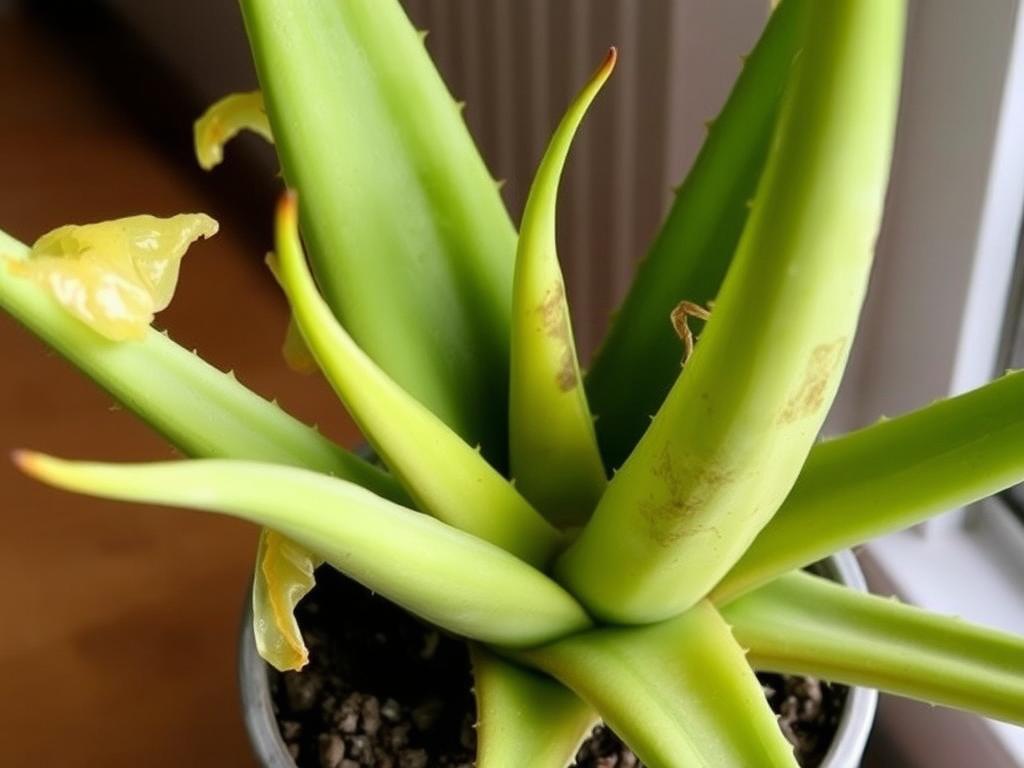
Signs Your Aloe Is Overwatered
- Soft, mushy leaves that may appear translucent
- Yellowing throughout the plant (not just on older outer leaves)
- Brown spots developing on leaves
- Foul smell from the soil or base of the plant
- Stem collapse or a plant that’s falling over
Why Overwatering Happens
Aloe vera plants store water in their thick leaves – it’s their survival strategy for desert conditions. When you water too frequently, the roots sit in moisture they can’t use, leading to root rot. This happens most often when:
- You water on a strict schedule instead of checking soil moisture
- Your pot lacks proper drainage holes
- You’re using regular potting soil instead of well-draining cactus mix
- The plant is in a pot that’s too large for its root system
How to Fix an Overwatered Aloe
If you’ve caught the problem early, simply stop watering and let the soil dry out completely. For more serious cases:
- Remove the plant from its pot and gently shake off excess soil
- Inspect the roots – healthy roots are firm and white or light tan
- Trim away any black, mushy roots with clean scissors
- Let the plant dry out for 2-3 days in a warm, dry spot
- Repot in fresh, well-draining cactus soil in a clean pot with drainage
- Wait a week before watering to allow any cuts to heal
Going forward, only water when the soil is completely dry – usually every 2-3 weeks in growing season and even less in winter. When you do water, soak thoroughly until water runs from the drainage holes, then don’t water again until the soil is completely dry.
Mistake #2: Giving Your Aloe the Wrong Light
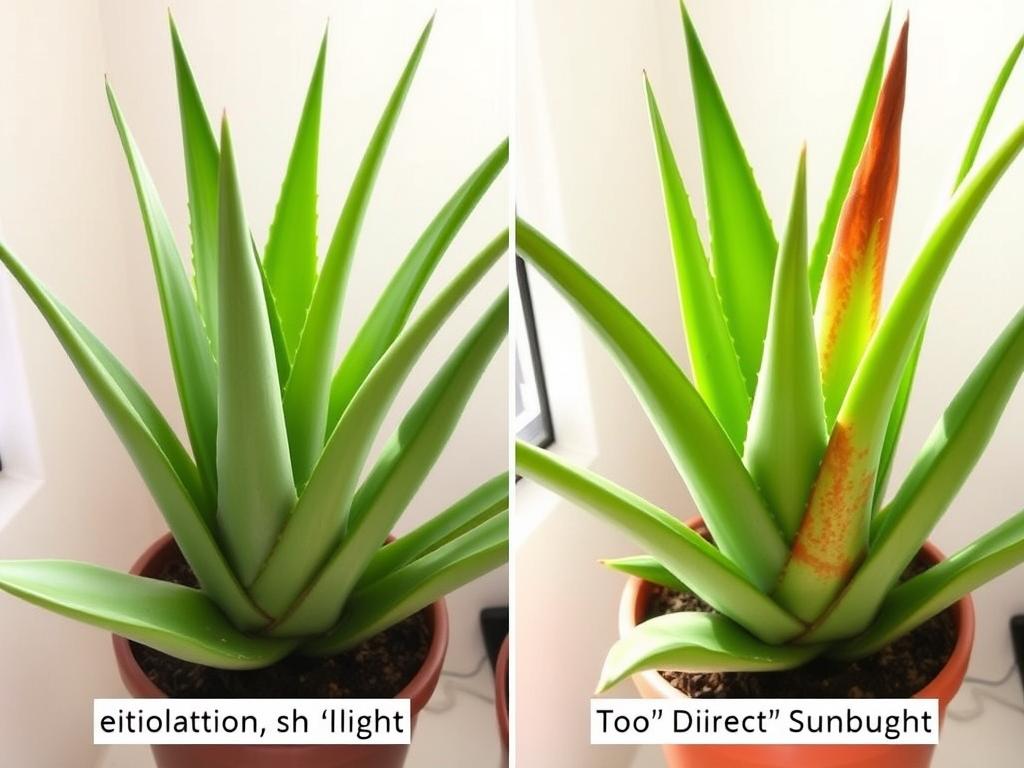
Signs of Insufficient Light
Aloe vera plants need plenty of bright light to thrive. Without enough light, they’ll tell you they’re struggling:
- Stretching or leaning toward light sources
- Thin, weak leaves instead of plump, upright ones
- Pale, dull green color instead of vibrant color
- Slow or stunted growth with long gaps between leaves
Signs of Too Much Direct Sun
While aloe vera needs bright light, too much intense, direct sunlight can cause problems too:
- Leaves turning reddish-brown or appearing “sunburned”
- Dry, crispy leaf tips or edges
- Leaves that look bleached or washed out
Finding the Perfect Light Balance
The ideal spot for your aloe vera is near a south or west-facing window where it gets bright, indirect light most of the day. If you need to move your plant outdoors for summer, do it gradually:
- Start with just 1-2 hours of morning sun for the first week
- Gradually increase sun exposure over 7-10 days
- Avoid the intense midday sun, especially in hot climates
- Bring plants indoors before temperatures drop below 50°F (10°C)
If your home doesn’t have ideal light conditions, consider a grow light designed for succulents to keep your aloe happy during darker months.
Mistake #3: Using the Wrong Soil and Pot
One of the biggest aloe vera care mistakes is planting these desert-loving succulents in regular potting soil and containers without proper drainage. This setup is practically guaranteed to lead to problems!
Problems with Regular Potting Soil
Standard potting soil holds too much moisture for aloe vera plants. This leads to:
- Soggy roots that can’t access oxygen
- Increased risk of fungal and bacterial diseases
- Nutrient imbalances as soil breaks down
- Compacted soil that doesn’t allow proper root growth
Issues with Improper Pots
The pot you choose matters almost as much as the soil:
- No drainage holes = nowhere for excess water to escape
- Plastic or glazed pots retain more moisture than terracotta
- Too-large pots hold excess soil that stays wet longer
- Too-small pots lead to root binding and unstable plants
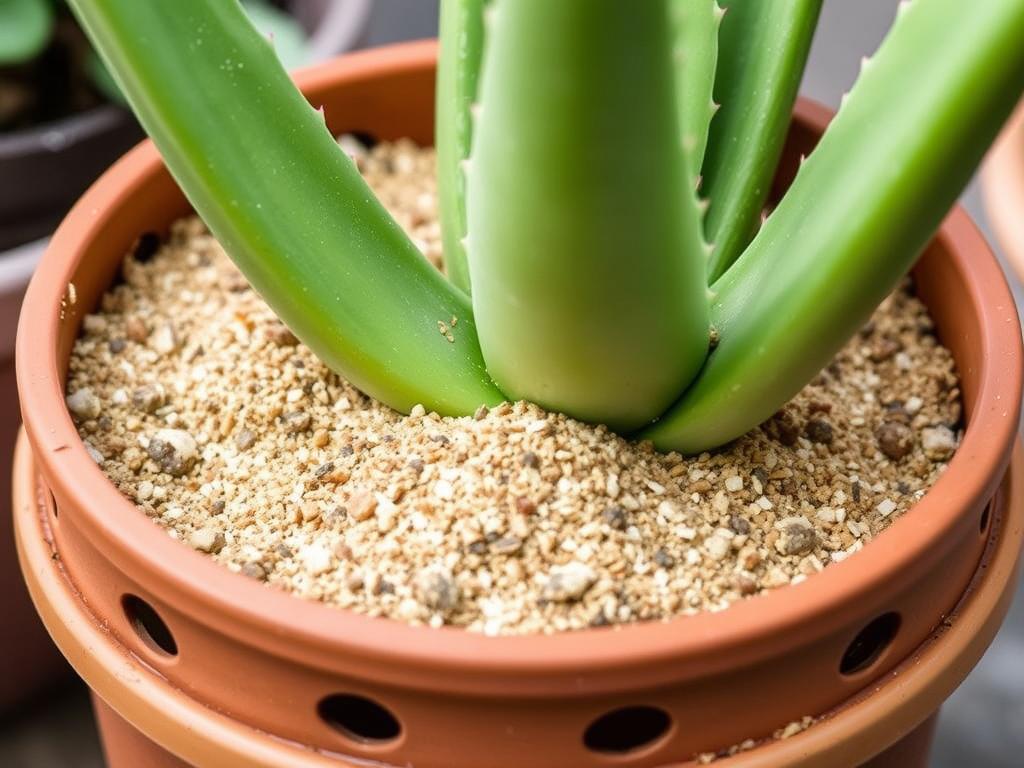
Creating the Perfect Aloe Home
Here’s how to set up your aloe vera for success:
- Choose a well-draining soil mix – commercial cactus/succulent mix or make your own by mixing regular potting soil with 40-50% perlite, pumice, or coarse sand
- Select a pot with drainage holes – multiple holes are even better
- Consider terracotta or unglazed clay pots – they’re porous and help soil dry faster
- Size the pot appropriately – just 1-2 inches wider than the plant’s root ball
- Add a layer of gravel at the bottom for extra drainage (optional)
If you suspect your aloe is suffering from poor soil or pot conditions, don’t hesitate to repot it. Spring and summer are ideal times, but a struggling plant can be repotted any time if necessary.
Mistake #4: Ignoring Pests and Diseases
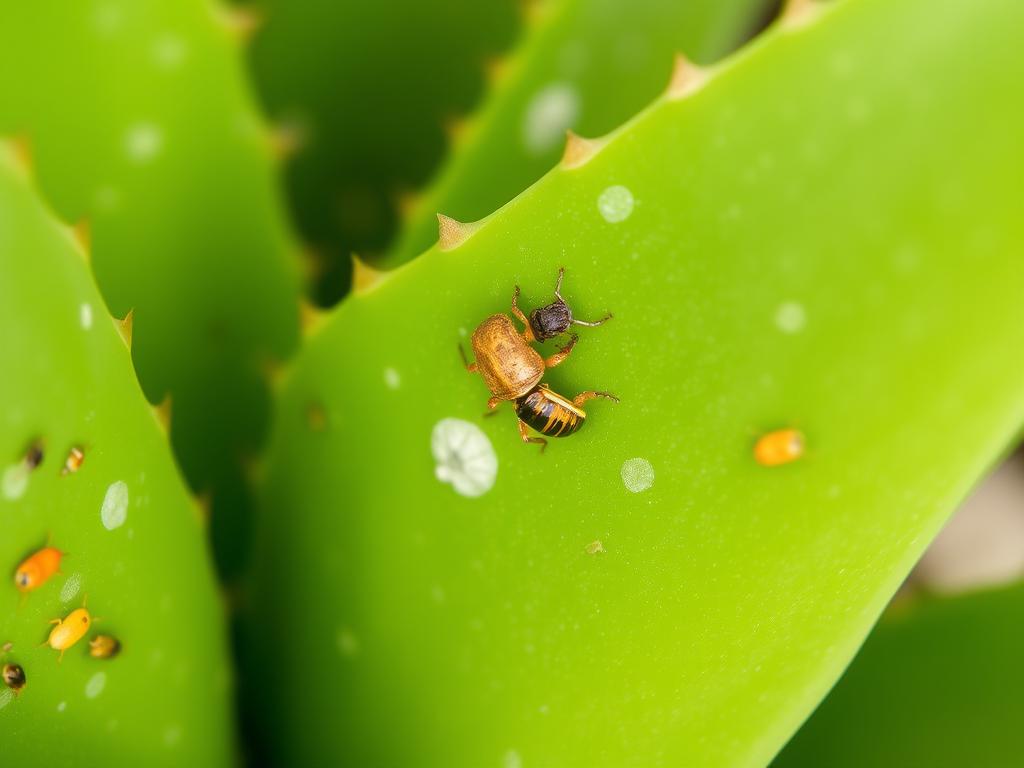
While aloe vera plants are generally resistant to many pests and diseases, they’re not completely immune. Ignoring early signs of trouble can lead to serious problems that are harder to fix later.
Common Aloe Vera Pests
Keep an eye out for these unwelcome visitors:
- Mealybugs – Look like small white cotton balls, usually in leaf crevices
- Scale insects – Small brown or black bumps that don’t move, often along leaf midribs
- Spider mites – Tiny red or brown specks that create fine webbing, causing pale spots
- Fungus gnats – Small flying insects around the soil, a sign of overwatering
- Aphids – Tiny green, black, or white insects that cluster on new growth
Common Aloe Diseases
Most aloe diseases are related to moisture problems:
- Root rot – Causes blackening at the base and a foul smell
- Leaf rot – Soft, mushy patches that spread across leaves
- Fungal spots – Dark spots that may appear on leaves in humid conditions
- Bacterial soft rot – Rapid collapse and liquefaction of plant tissue
Prevention and Treatment
- Inspect new plants before bringing them home
- Quarantine any new plants for 2-3 weeks away from your collection
- Check plants regularly for early signs of problems
- Ensure good air circulation around plants
- Avoid wetting the leaves when watering
If you do spot pests:
- Isolate the affected plant immediately
- For mealybugs and scale: Dab with alcohol on a cotton swab
- For spider mites: Increase humidity and spray with water
- For persistent problems: Use insecticidal soap or neem oil
- For severe infestations: Consider removing heavily affected leaves
For diseases, improving growing conditions is often the best remedy. Remove affected parts with clean tools, reduce watering, and ensure better drainage and air circulation.
Mistake #5: Improper Fertilizing and Temperature Stress
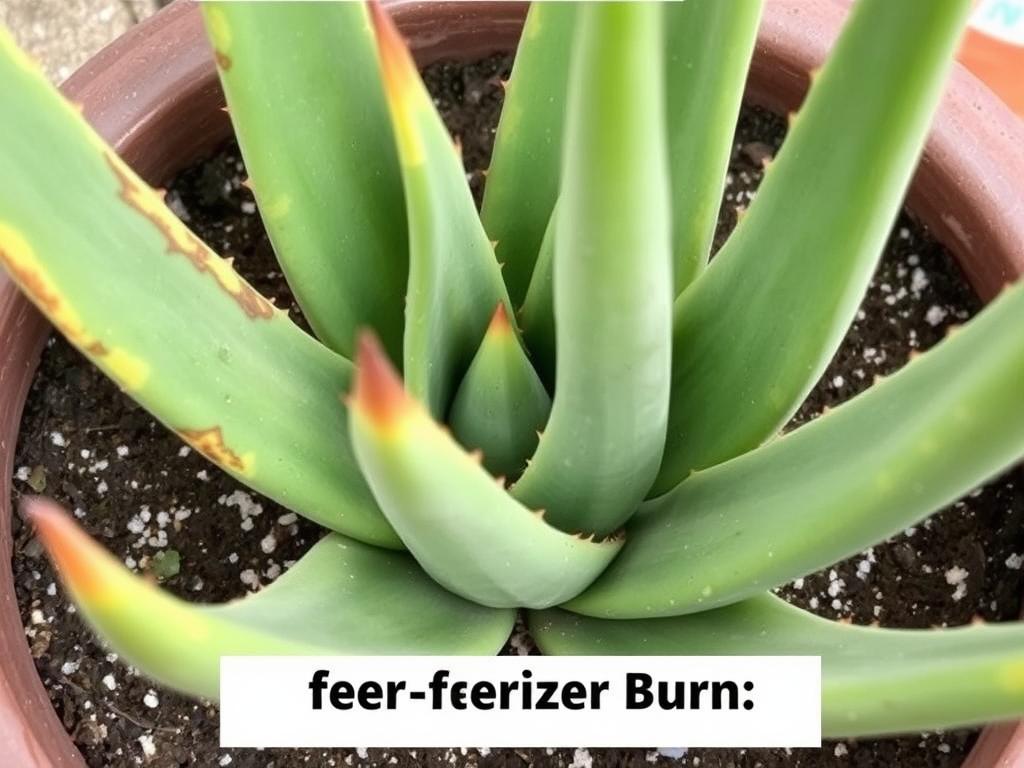
Fertilizer Problems
Many people make the aloe vera care mistake of treating these desert plants like hungry garden flowers. In reality, aloe vera has modest nutritional needs:
- Over-fertilizing causes salt buildup, burning roots and leaf edges
- Fertilizing at the wrong time (winter dormancy) stresses the plant
- Using the wrong fertilizer (high nitrogen) causes weak, floppy growth
Signs of fertilizer problems include:
- Brown or crispy leaf tips and edges
- White crust on soil surface
- Unusually fast but weak growth
- Leaf burn or discoloration
Temperature Stress
Aloe vera plants can handle heat pretty well, but cold is their enemy:
- Cold damage occurs below 50°F (10°C)
- Frost is fatal to most aloe varieties
- Cold drafts from windows or doors can cause damage
- Sudden temperature changes stress the plant
Signs of temperature stress include:
- Soft, mushy patches that turn brown or black
- Transparent areas on leaves after cold exposure
- Wilting or drooping despite adequate water
Solutions for Proper Care
For fertilizing:
- Use a diluted (half-strength) succulent fertilizer only during growing season (spring/summer)
- Fertilize no more than once every 1-2 months
- Skip fertilizing entirely in fall and winter
- If you suspect over-fertilization, flush the soil thoroughly with water
For temperature management:
- Keep indoor aloe between 55-80°F (13-27°C)
- Move outdoor plants inside before temperatures drop below 50°F
- Keep away from cold drafts, air conditioners, and heaters
- Protect from sudden temperature changes
Remember that aloe vera evolved to thrive with minimal care in harsh conditions. Sometimes the best care is minimal intervention!
Mastering the "Soak and Dry" Watering Method
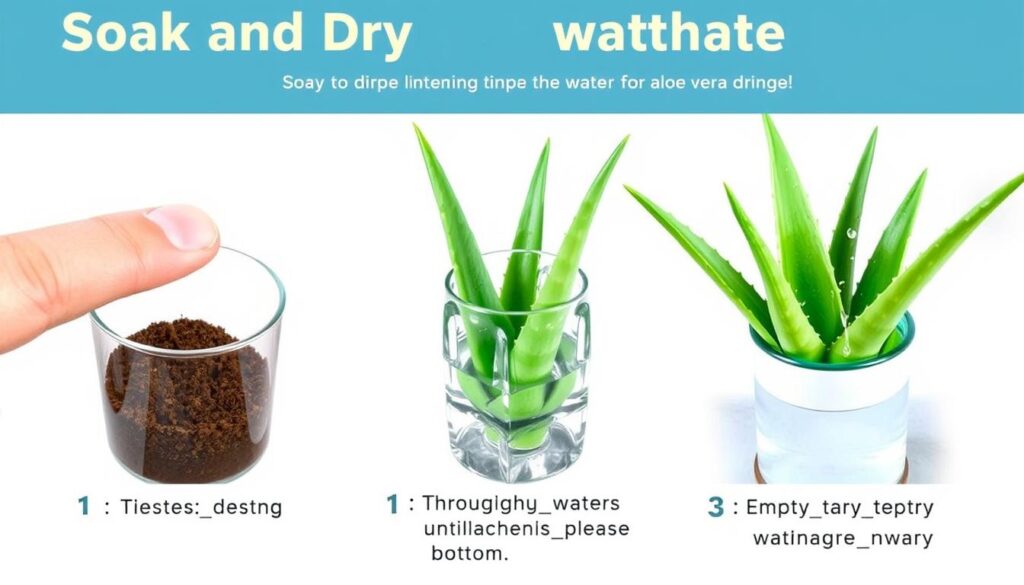
The single most important skill for avoiding aloe vera care mistakes is mastering the right watering technique. The “soak and dry” method mimics the desert rain patterns these plants evolved with:
How to Water Aloe Vera Properly
- Check before watering – Insert your finger 2 inches into the soil; only water if completely dry
- Water thoroughly – Pour water until it flows freely from the drainage holes
- Empty the drainage tray – Never let your plant sit in standing water
- Wait until completely dry – This might be 2-3 weeks in summer and 4-6 weeks in winter
This method encourages deep, healthy root growth while preventing the root rot that comes from constant moisture. Remember that it’s always better to underwater than overwater your aloe vera!
Pro Tip: If you’re unsure whether to water, wait another week. Aloe vera can recover from drought much easier than from overwatering.
When and How to Repot Your Aloe Vera
Another common aloe vera care mistake is not repotting when necessary or doing it incorrectly. Healthy aloe plants will eventually outgrow their containers, usually needing repotting every 2-3 years.
Signs Your Aloe Needs Repotting
- Roots growing out of drainage holes
- Plant becoming top-heavy or falling over
- Soil drying out extremely quickly
- Growth slowing despite proper care
- Multiple pups (baby plants) crowding the pot
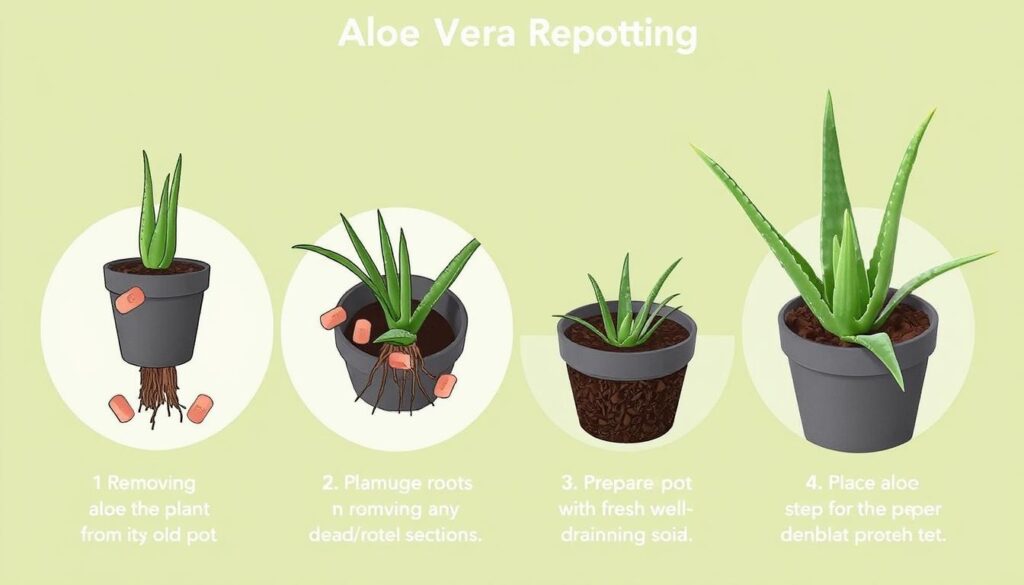
Step-by-Step Repotting Guide
- Prepare your workspace with fresh cactus/succulent soil, a new pot with drainage holes (just 1-2 inches larger than the current one), and clean gardening tools.
- Water the plant lightly a day before repotting to make removal easier and reduce stress.
- Gently remove the plant by turning the pot sideways and carefully sliding it out. Don’t pull on the leaves!
- Inspect and clean the roots, removing any that are dead, rotted, or damaged. Healthy roots are firm and light-colored.
- Let the plant dry for 1-2 days if you’ve trimmed any roots to allow cuts to callus over.
- Add fresh soil to the new pot, creating a small mound in the center.
- Position the aloe so the base of the lowest leaves sits just above the soil line.
- Fill in around the roots with more soil, gently pressing to stabilize the plant.
- Wait a week before watering to allow any root injuries to heal and prevent rot.
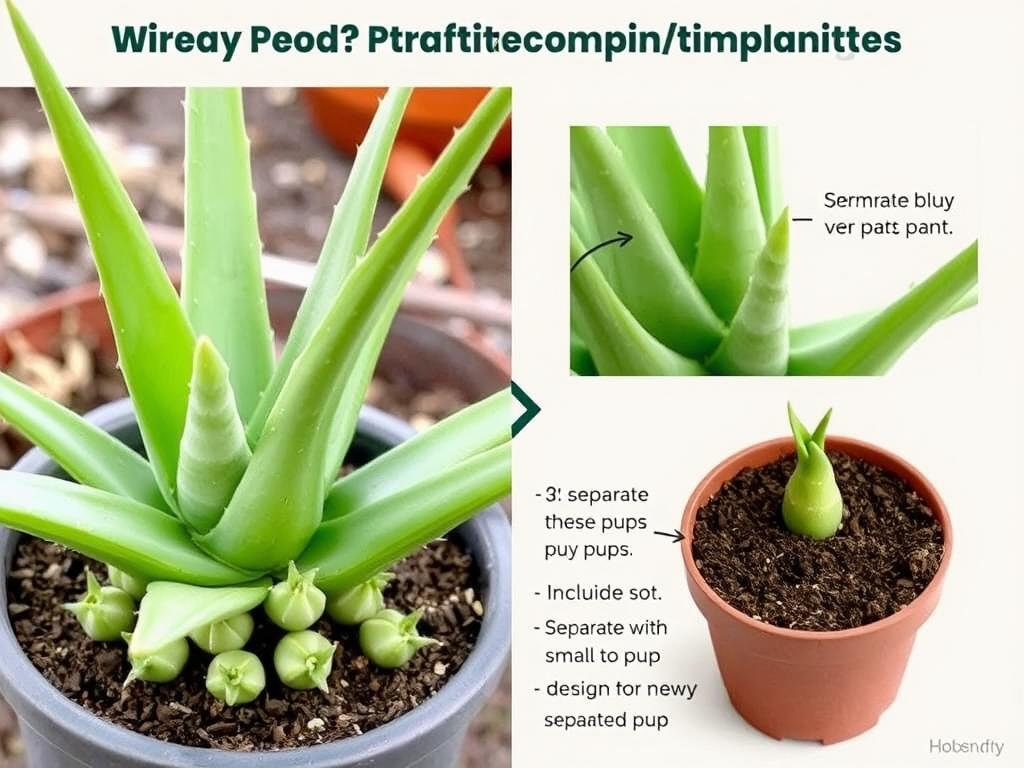
Repotting is also the perfect time to separate any pups (baby plants) that have formed around the base of the mother plant. These can be potted individually to expand your aloe collection or share with friends!
Propagating Aloe Vera: Growing Your Collection
Once you’ve mastered basic aloe vera care and avoided common mistakes, you might want to expand your collection through propagation. Unlike many succulents, aloe vera can’t be grown from leaf cuttings. Instead, you’ll need to use one of these methods:
Propagating from Pups (Offsets)
The easiest and most reliable method is to separate the small baby plants (pups) that grow around the base of mature aloe:
- Wait until pups are at least 2-3 inches tall with several leaves of their own.
- Remove the mother plant from its pot to access the pups and their roots.
- Locate where the pup connects to the mother plant.
- Use a clean, sharp knife to separate the pup, ensuring it has some roots attached.
- Allow the cut surfaces to dry for 1-2 days.
- Plant each pup in a small pot with well-draining cactus soil.
- Wait a week before watering to allow any cuts to heal.
Pups will grow into full-sized plants within a year or two with proper care. This method also helps keep your main plant from becoming overcrowded.
Sharing Tip: Potted aloe pups make wonderful gifts! Include a small care card with watering instructions to help your friends avoid common aloe vera care mistakes.
Conclusion: Your Path to Aloe Vera Success
Avoiding common aloe vera care mistakes comes down to understanding this plant’s desert origins. By mimicking its natural conditions – bright light, infrequent but thorough watering, well-draining soil, and protection from extreme cold – you’ll be rewarded with a beautiful, healthy plant that can thrive for years.
Remember that aloe vera is remarkably resilient. Even if you’ve made some of these mistakes, your plant can often bounce back with proper care. The most important thing is to observe your plant closely and respond to its needs rather than following a rigid care schedule.
With the knowledge you’ve gained about avoiding aloe vera care mistakes, you’re well-equipped to grow these beneficial plants successfully. Your reward will be not just an attractive houseplant, but also a living first-aid kit with soothing gel for minor burns, cuts, and skin irritations.
Want More Plant Care Tips?
Download our free Succulent Care Guide for beginners and never make another plant care mistake! This comprehensive guide includes care sheets for aloe vera and 10 other popular succulents.